Personal Greybox Tool
One of the most common and tedious tasks for Game Designers is the task of Greyboxing. If you are unfamiliar, greyboxing is when a Game Designer creates the rough physical space of a level using only grey boxes (hence the name). This is useful because it allows Designers to create the space of a level to design the gameplay for a game within that space, without needing all of the assets of the project to be complete. Once an artist finishes an art piece, they can simply replace a piece of the greybox with the piece of art with minimal impact to the gameplay of the level itself. One could use Unity to repeatively create Primitive Cubes, but that can take up a lot of time, so most Designers user a Unity Plugin called ProBuilder. I, however, wanted to task myself with creating a tool from scratch. Unity has a powerful Tool Development environment, and through this project, I was able to really get a grasp at what I could actually accomplish with it.
Being inexpeienced at the Unity world of Tools, I immediately hit the books, surfing the web finding any sort of resources on Tool Development. The Unity documentation is very lacking when it comes to Tools Development, however I was lucking to stumble upon a YouTube channel run by a Unity Tools Developer who has many tutorials on what you should and shouldn’t do when designing Tools. Their name is Freya Holmér and you can find their YouTube at: https://www.youtube.com/channel/UC7M-Wz4zK8oikt6ATcoTwBA. This was by far the best material that I have been able to come across, and it was immensely helpful. She had many examples, and was very thorough in her explanations of the topics.
After hours of research, I was able to get my very own tool window to open! I was able to create SerializedFields to manipulate data within the Editor. From here, I started by having a basic cube spawn and despawn when you open and close the tool respectively. After that, I created 6 yellow spheres that displayed on every side of the cube, and decided to dig into some interactive funtionality. I discovered that Unity allows you to add functions that you would like to be called whenever the Scene window updates, which takes some simple code:
private void OnEnable()
    {

        SceneView.duringSceneGui += DuringSceneGUI;

	}

void DuringSceneGui()
	{
		Debug.Log("Scene Update");
	}
By using this, I was able to get functionality working within the Scene view rather than just in the window of my own tool. By checking the mouse selection, I was able to determine when the user had selected one of the yellow spheres that have been created. When they did, I had my tool delete the sphere, create a new cube in it’s place. Getting this working was very satistifying, but it wasn’t as exciting as when I got it to work recursively! Every new cube had new yellow sphere handles, which could be clicked over and over to quickly create many cubes for your greybox!
I then added some adjustible settings in the tool, such as changing the size of the cubes that spawn. Every cube that would spawn was placed in a empty game object in the scene for organization, however if the user didn’t want their greybox, if they closed the tool, their work would autmatically be deleted, so I also added a “Finalize” button to the tool, that would rename the empty game object, then delete all of the yellow sphere handles, and protect it from getting removed with the tool’s disappearance.
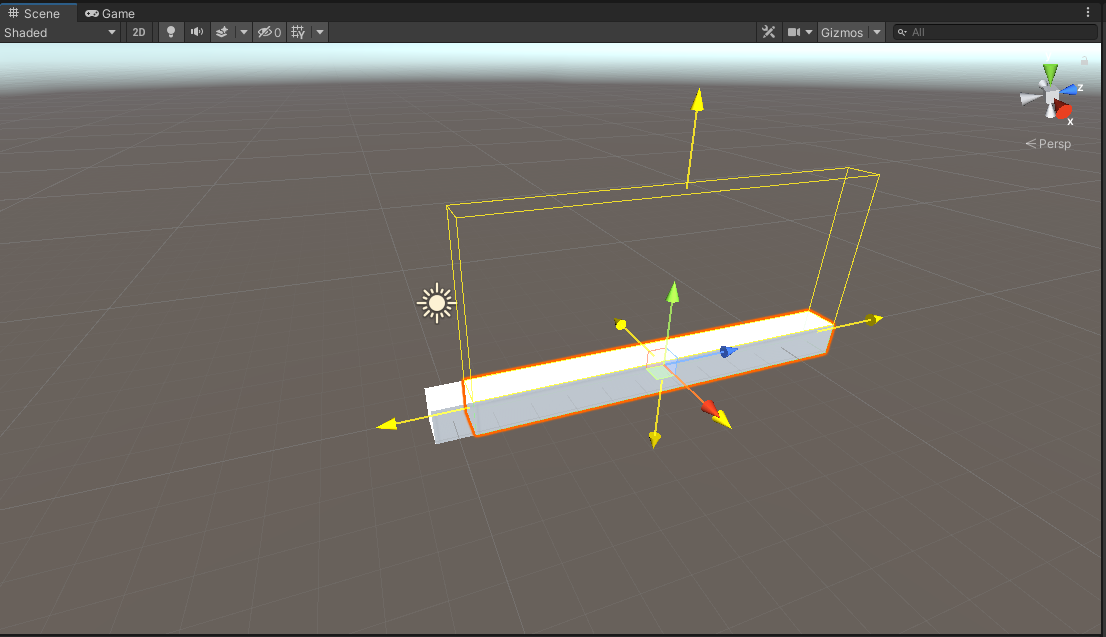
At this point, I was very happy with my work, but I still felt it could be more intuitive! So I started exploring Unity’s Handles class. By using this class, I was able to get six yellow Unity handles to spawn in the scene on all six sides of the greybox object that you select in the scene. These look very similar to the XYZ position handles that you commonly see with Unity. With these, I was able to have a wire cube visually display where the cube will be placed as the user drags one of the handles away from the cube. When they release the drag, a cube automatically gets placed with the scale and position shown by the wire cube. This can be seen in the image above. Here is some code that I used to create cubes when the user released their mouse button:
 if (Event.current.type == EventType.MouseUp && Event.current.button == 0)
    {
		if (posXVal != 0.0f)
        {
            Vector3 newCubeScale = new Vector3(posXVal, selectedObject.transform.localScale.y, selectedObject.transform.localScale.z);
            GameObject obj = CreateGreyCube(selectedObject.transform.position + new Vector3((parentTransform.localScale.x / 2.0f + newCubeScale.x / 2.0f), 0.0f, 0.0f), newCubeScale);
            Undo.RegisterCreatedObjectUndo(obj, "Expand Greybox");
            posXVal = 0.0f;
        }
		// Repeat for every axis
	}
With this implementation, I went back and removed the handle sphere funtionality, as the Unity Handles made it a lot more intuitive. I also integrated it with Unity’s Undo system, so you can quickly undo any mistakes that are made along the way. This code snip above only scratches the surface, and I really recommend that you look at my full GitHub repo of the project! You can find the link here: https://github.com/redy9567/PortfolioProject2
Reflecting on this project, I was really happy with the outcome, and I learned a lot through the process. Watching Freya’s content really got me excited about the work that Tools & Pipeline programmers do on a day-to-day basis. On the surface, I thought that creating Unity Handles would be a long and complicated process, but it was very simple. Going forward, I would like to spend more time understanding all of the different Unity Classes than can help out with creating useful and intuitive tools. The Handles class was a massive help when drawing anything to the screen, and I only hope to learn about other classes that may help out in other contexts. Moving on, this project may be something that I tweak here and there, but overall, I’m super excited to learn more about optimizing workflow.